


Frequently Asked Questions (FAQ)
1. General Questions
- 1.1 I cannot connect the display unit to my computer.
1. You do not have a valid license of the software PinchPilot.
In the software PinchPilot, check the menu “Extras” -> “License” to see if a license key has been entered.
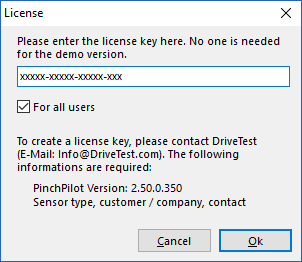 If there is no license key provided, please contact our support via e-mail (info@drivetest.de) or via phone (+49 89 74 34 09 40). Please provide the following information: sensor type, serial number of the sensor and version number of the software PinchPilot. (See also: Which information is required for technical support?)
2. The interface for connecting the display unit is not configured correctly.
Please connect the USB adapter and check the available connections in the device manager (“Control panel” on your PC).
- Open the Windows Device Manager.
- Open “Ports“.
- Now connect the USB to serial adapter.
- Now the USB to serial adapter is displayed as “Prolific USB to Serial Comm Port (COMx)” (under “Ports (COM & LPT)”).
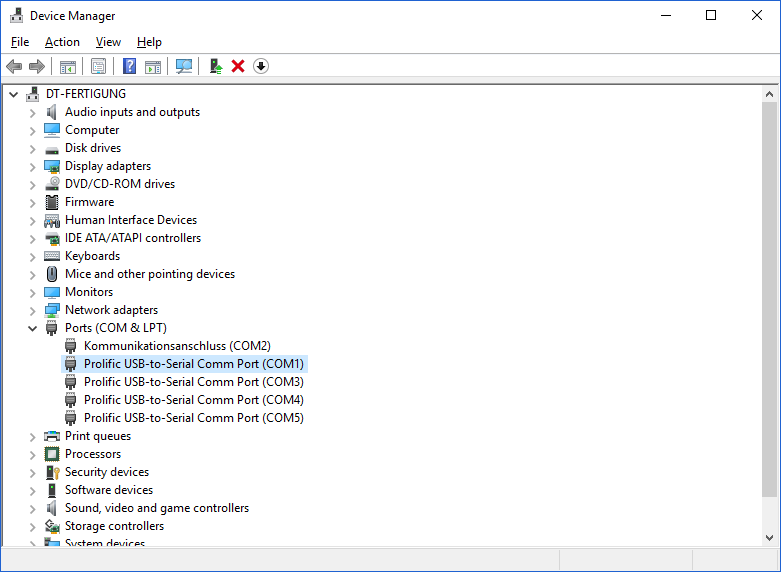
- Please note the displayed COM port.
- Please open the software PinchPilot.
- Go in the menu to “Extras” -> “Options” -> “Sensorbox”.
- In the section “Port”, set the same port as displayed before in the device manager and click “Ok”.
- Connect the display unit to the cable, and turn on the display unit.
- Press the button “Load measure data from sensor” or start a measurement in the measuring menu.
If there is no Prolific USB to Serial Comm port (COMx) in the device manager, you have to download the current driver of the USB adapter:
http://drivetest.de/download/Install_USB_Serial_Port_win2000_xp_vista_x86_x64.zip. - 1.2 Where is the manual of the device?The manual of your device can be found in the transportation case cover.
Here you will find instructions for measuring with sensor and display unit, for installing the software PinchPilot and much more.
- 1.3 Where is the calibration certificate of the device?The calibration certificate can be found in the transportation case cover.
- 1.4 What are the parts of a pinch force measuring system?
An electronic pinch force measuring system consists of the following parts:
1. Sensor / measuring device:
The sensor is held between the closing edges for measuring the pinch force. We offer the right sensor for almost every application and every standard.
Sensor types, e.g.: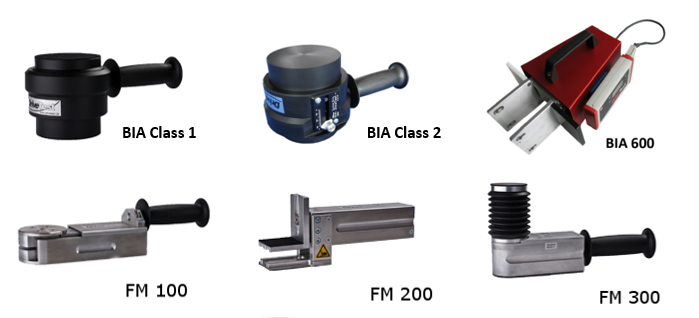
Further information about the individual sensors can be found under “Force Measuring”.
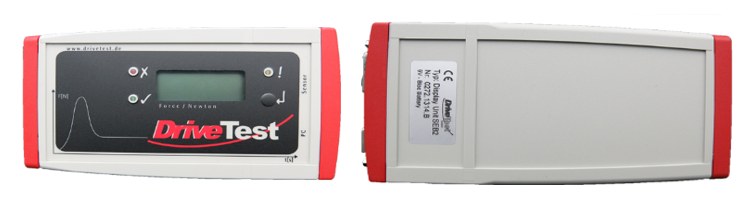
2. Display unit:
The display unit is used to display, evaluate and store the measurements. A short guide to measuring is attached to the back of the display unit.
3. Software PinchPilot:
The software PinchPilot is used for the analysis of the measurements, the generation of reports, the export of measurement data, the direct measurement via software, etc.
Exception:
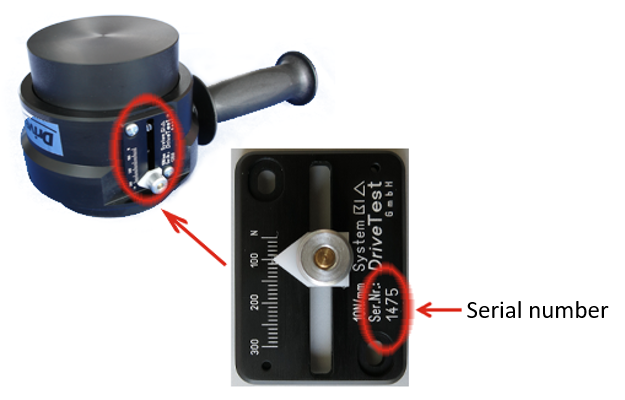
The mechanical device BIA Class 2 consists only of the sensor. The serial number can be found directly on the sensor below the drag pointer.
- 1.5 Which information is required for technical support?
1. The name of the measuring device/ sensor:
It can be found on the type sign on the sensor under “Typ”.

Sensor types, e.g.:
Further information about the individual sensors can be found under “Force Measuring”.2. The serial number of the sensor:
It can be found on the type sign on the sensor under “Nr.”.
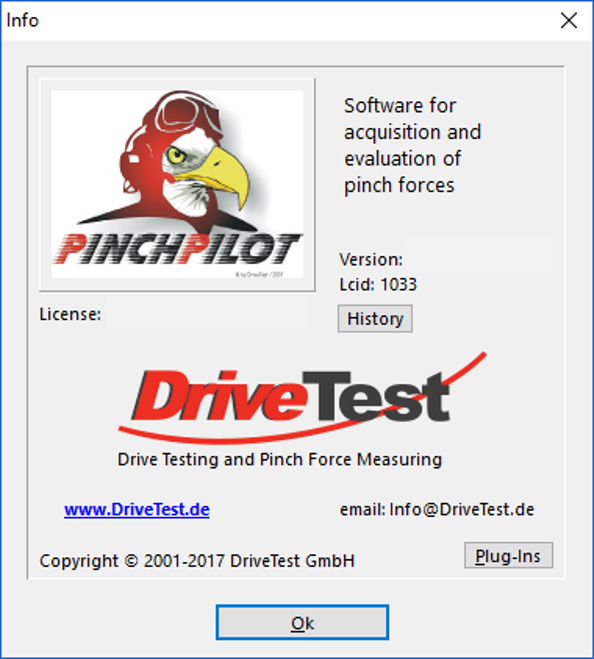
3. The version number of the software PinchPilot:
It can be found within the software PinchPilot in the menu under the symbol “?” – > “ Info ” or by double – clicking the eagle in the standard window .
- 1.6 Where are the measurements / measurement data stored?The measured data is stored in the display unit.
The display unit has only limited memory, so it could be useful to delete the memory of the display unit after transferring the data to the PC. - 1.7 How can I transfer the measured data to my computer?
- Please start the software PinchPilot.
- Connect the display unit to the cable, and turn on the display unit.
- Press the button “Load measured data” or start a measurement in the measuring menu.
Details can be found in the manual of your device, in chapter “Measuring”.
- 1.8 The measurement has started, but no data is displayed. This can have many causes, e.g.:
- Low battery
- Loose connection after a fall
- Cable break (caused by improper use or aging of the material)
- 1.9 Which components do I need to send to Drive Test for calibration or repair?
Please always send us the complete measuring system. For example, a repair on the sensor may require a readjustment, for which the display unit is also required.
Please send your devices to:
Drive Test GmbH
Adi-Maislinger-Str. 9
81373 Munich
GermanyPlease use the shipping documents under “Service & Support/ Calibration service”.
- 1.10 Where should I send my devices for calibration?Please send your devices to:
Drive Test GmbH
Adi-Maislinger-Str. 9
81373 Munich
GermanyPlease send both the sensor and the display unit to us. (See also: What are the parts of a pinch force measuring system?)
Please use the shipping documents under “Service & Support/ Calibration service”.
- 1.11 Where should I send my devices for repair?Please send your devices to:
Drive Test GmbH
Adi-Maislinger-Str. 9
81373 Munich
GermanyPlease send both the sensor and the display unit to us. (See also: What are the parts of a pinch force measuring system?)
Please give us your error message or your problem with the sensor or the display unit.
Please use the shipping documents under “Service & Support/ Calibration service”.
- 1.12 Where can I find the serial numbers of my devices?
1. The serial number of the sensor:
It can be found on the type sign on the sensor under “Nr.”.
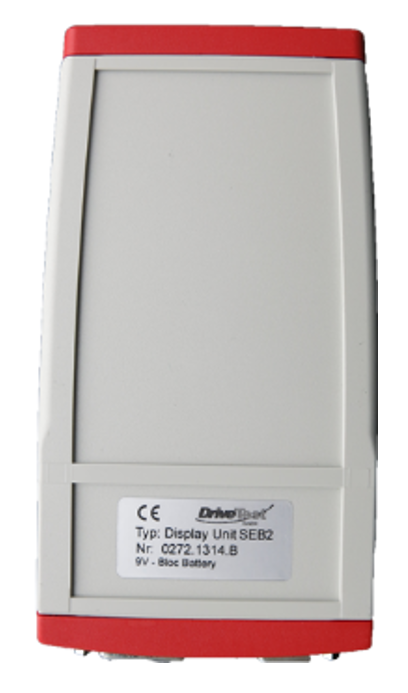
2. The serial number of the display unit:
It can be found on the back on the type sign under “Nr.”.
3. The version number of the software PinchPilot:
It can be found within the software PinchPilot in the menu under the symbol “?” -> “Info” or by double-clicking the eagle in the standard window.
- 1.13 What is the meaning of the error messages of the display unit?The following table shows the most frequent error messages shown by the display unit and their meaning.
Error Meaning Frequent causes Proposed action E:20 Connection to device changed while device was running Sensor cable was connected/ disconnected, while the device was turned on Only connect/ disconnect the sensor from the device when the device is turned off Cable break Please contact our support Electronic of sensor is defect Please contact our support E:30 Sensor supply voltage is wrong Battery voltage is too low Change battery Cable break Please contact our support Voltage regulator is defect Please contact our support E:88,
E:89Communication with sensor failed Cable break Please contact our support Electronic of sensor is defect Please contact our support A table with the meanings of all error messages can also be found in the manual of your measuring device under “Appendix”.
- 1.14 Where can I find information about the technical data of my measuring device?
The technical data on stiffness, accuracy, temperature range etc. can be found in the manual of your measuring device in the section “Technical data” or under “Force measuring”.
- 1.15 Where can I find the prices of the measuring systems?To receive an offer on one or more of our measuring systems, please send us your inquiry via e-mail to info@drivetest.de or go to our website on “Force Measuring” to the measuring system you are interested in and click on “Quotation request”. We will contact you as soon as possible.
- 1.16 How should I transport the measuring system?Please always use the transportation case to transport your measuring system.
Whether you have to pay attention to other things for transport, it depends on whether you have a SEB2 or a SEB2.2 as display unit. Please have a look on the back of the display unit. There you will find under “Type” the name SEB2 oder SEB2.2.
1. SEB2:
Please always use non-rechargeable batteries (primary batteries) for the SEB2.
These are not considered as dangerous goods and therefore you don’t have to mark them during transport.
2. SEB2.2:
The SEB2.2 contains a Lithium-Polymer battery cell.
These are classified as dangerous goods in transportation. As this is a build-in battery cell please follow guidelines UN3481 and respect your local law.
Please use the shipping documents under “Service & Support/ Calibration service”.
2. Questions about the measuring device / sensor
- 2.1 What is the sensor and what is it used for?
The sensor is held between the closing edges for measuring the pinch force. We offer the right sensor for almost every application and every standard.
Sensor types, e.g.:Further information about the individual sensors can be found on our website under “Force Measuring” or in the manual of your device, chapter “Pinch force sensor”.
- 2.2 Where is the manual of the device?The manual of your device can be found in the transportation case cover.
Here you will find instructions for measuring with sensor and display unit, for installing the software PinchPilot and much more. - 2.3 Where is the calibration certificate of the device?The calibration certificate can be found in the transportation case cover.
- 2.4 Where can I find the serial number of the sensor?The serial number of the sensor can be found on the type sign on the sensor under “Nr.”.
- 2.5 Where can I find information about the technical data of my measuring device?The technical data on stiffness, accuracy, temperature range etc. can be found in the manual of your measuring device in the section “Technical data” or on our website under “Force measuring”.
- 2.6 Where can I find the prices of the measuring systems?To receive an offer on one or more of our measuring systems, please send us your inquiry via e-mail to info@drivetest.de or go to our website on “Force Measuring” to the measuring system you are interested in and click on “Quotation request”. We will contact you as soon as possible.
3. Questions about the display unit
- 3.1 What is the display unit and what is it used for?The display unit is used to display, evaluate and store the measurements. A short guide to measuring is attached to the back of the display unit.
Further information on the display unit can be found in the manual of your measuring device under “Display unit”. - 3.2 Can the display unit be used with different measuring devices?No, because the measured value acquisition frequency (= sampling rate) is set for the individual application.
But the display unit can be used for measuring devices of the same sensor type (for example for two sensors BIA Class 1). - 3.3 What is the meaning of the error messages of the display unit?The following table shows the most frequent error messages shown by the display unit and their meaning:
Error Meaning Frequent causes Proposed action E:20 Connection to device changed while the device was running Sensor cable was connected/ disconnected, while the device was turned on Only connect/ disconnect the sensor from the device when the device is turned off Cable break Please contact our support Electronic of sensor is defect Please contact our support E:30 Sensor supply voltage is wrong Battery voltage is too low Change battery Cable break Please contact our support Voltage regulator is defect Please contact our support E:88,
E:89Communication with sensor failed Cable break Please contact our support Electronic of sensor is defect Please contact our support A table with the meanings of all error messages can also be found in the manual of your measuring device under “Appendix”.
- 3.4 While measuring, different values are displayed on the display unit than in the evaluation on the PC.This is because the refresh rate of the display unit is lower than the sampling frequency of the sensor. The sampling frequency of the sensor is between 250Hz and 500Hz, depending on the device. The display unit is updated only 3-4 times per second for better readability.
- 3.5 Should I use rechargeable or non-rechargeable batteries for the display unit?It depends on whether you have a SEB2 or a SEB2.2 as display unit. Please have a look on the back of the display unit. There you will find under “Type” the name SEB2 oder SEB2.2.
1. SEB2:
Please always use non-rechargeable batteries (primary batteries) for the SEB2.
In contrast to primary batteries, secondary batteries provide a higher short circuit current which can lead to a destruction of the measuring bridge or of the display unit.
2. SEB2.2:
The SEB2.2 is equipped with a rechargeable Lithium-Polymer battery cell (secondary batteries).
The battery is loaded via USB interface. Loading source can be either a PC or a USB charging device.
(See also: How should I transport the measuring system?)
- 3.6 Where can I find the serial number of the display unit?The serial number of the display unit can be found on the back on the type sign under “Nr.”.
- 3.7 How should I transport the display unit?Please always use the transportation case to transport your measuring system.
Whether you have to pay attention to other things for transport, it depends on whether you have a SEB2 or a SEB2.2 as display unit. Please have a look on the back of the display unit. There you will find under “Type” the name SEB2 oder SEB2.2.
1. SEB2:
Please always use non-rechargeable batteries (primary batteries) for the SEB2.
These are not considered as dangerous goods and therefore you don’t have to mark them during transport.
2. SEB2.2:
The SEB2.2 contains a Lithium-Polymer battery cell.
These are classified as dangerous goods in transportation. As this is a build-in battery cell please follow guidelines UN3481 and respect your local law.
Please use the shipping documents under “Service & Support/ Calibration service”.
4. Questions about the software PinchPilot
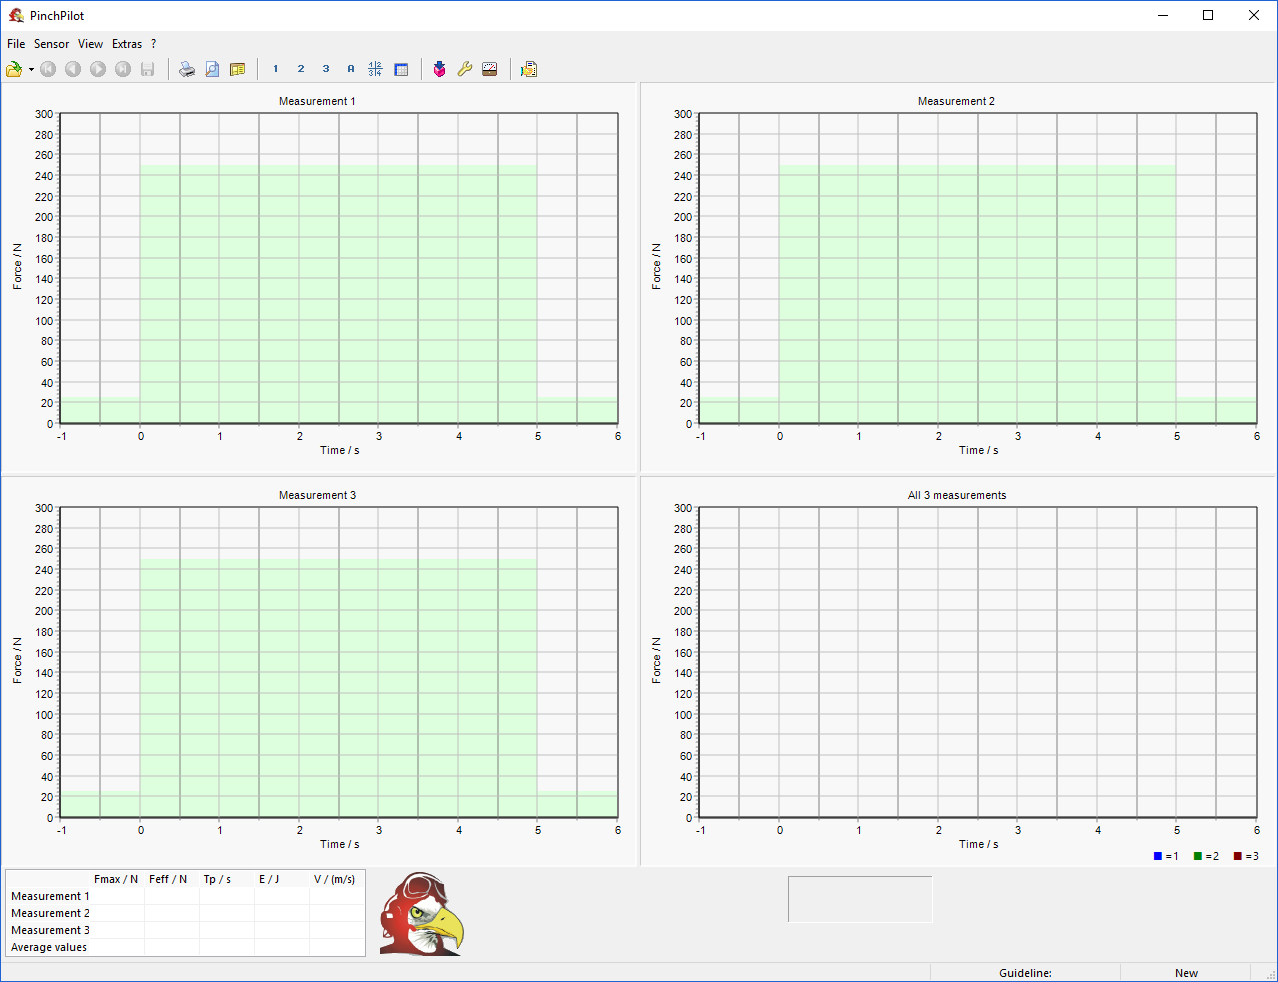
- 4.1 What is the PinchPilot and what is it used for?The software PinchPilot is used for the analysis of the measurements, the generation of reports, the export of measurement data, the direct measurement via software, etc.
Further information on the PinchPilot can be found in the manual of your measuring device under “Software PinchPilot”.
- 4.2 Which Windows versions does the PinchPilot software work with?The software PinchPilot works with Windows 2000, XP, Vista, 7, 8 and 10.
- 4.3 Where can I find the version number of the software PinchPilot?
The version number can be found within the software PinchPilot in the menu under the symbol “?” -> “Info” or by double-clicking the eagle in the standard window.
- 4.4 How do I get the latest version of the software PinchPilot?You can always download the latest version of PinchPilot on our website in the section “Service/ Downloads”.
Attention: Each new version has to be re-licensed. Please contact our support team via e-mail (info@drivetest.de) or via phone (+49 89 74 34 09 40). Please provide the following information: sensor type and serial number of the sensor. (See also: Which information is required for technical support?) - 4.5 I have problems with installing the software PinchPilot.Please contact our support team via e-mail (info@drivetest.de) or via phone (+49 89 74 34 09 40). Please provide the following information: sensor type and serial number of the sensor. (See also: Which information is required for technical support?)
If your PC has an Internet connection, we can also offer an installation or troubleshooting via Teamviewer.Further information on the PinchPilot can be found in the manual of your measuring device under “Software PinchPilot”.
- 4.6 How can a large number of measurement data from different customers be processed quickly?The software PinchPilot provides the function “sequence of measurements” (also described in the manual of your measuring device under “Measurement sequence”):
Single preparation – create mpmplates:
For each customer, a measurement sequence template with the corresponding measuring points and the general properties is created (in the menu under File -> Sequence of measurement or via the symbol in the function bar “Hand with sheet”).
In addition, a subdirectory should be created for each customer (e.g. “C:\Pinchpilot\MeasurementSequence\Templates\Customer1\01-01-2001”).
The templates can then be stored in the corresponding directories or opened for re-use in the menu via “File” -> “Save template as” or “Open template”.
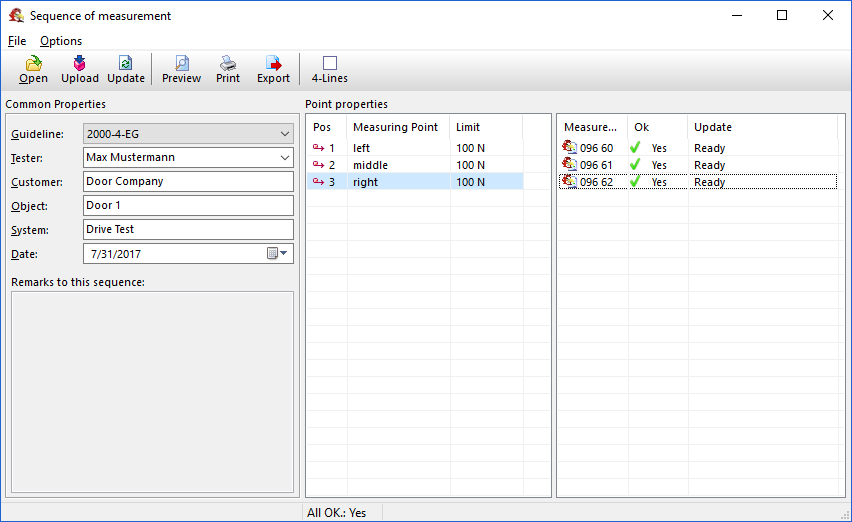
Analysis after each test day:
At the end of a test day, all measurements are loaded into the computer and pushed into the corresponding subdirectories by customer.
Then please start the measurement sequence in the software PinchPilot and drag the measurements from the Explorer into the right measuring field using drag and drop. Check the properties of the measuring points and make adjustments if necessary. The general properties (guideline, inspector, customer, etc.) are entered into all measurements with the function “Update”.
The result can then be printed on a sheet of paper.Further information for measuring and analysis can be found in the manual of your measuring device under “Measuring” or “Measurement sequence”.
- 4.7 Do I need a new license key after a software update? Each new version of the software PinchPilot requires a new license key. This involves additional costs. Please contact our support team via e-mail (info@drivetest.de) or via phone (+49 89 74 34 09 40). Please provide the following information: sensor type and serial number of the sensor. (See also: Which information is required for technical support?)
- 4.8 Can the software PinchPilot be integrated into existing software structures?The software PinchPilot can be remotely controlled via a DDE interface. Alternatively, we also offer a LabView library, which has easy-to-use public functions. An OPC client is also available via RSLinx for integration into a PLC environment. The right choice depends on your environment, and we are happy to help you.
- 4.9 While evaluating on the PC, different values are displayed than during the measurement on the display unit. This is because the refresh rate of the display unit is lower than the sampling frequency of the sensor. The sampling frequency of the sensor is between 250Hz and 500Hz, depending on the device. The display unit is updated only 3-4 times per second for better readability.